If you hear someone on the island exclaim, “Cheese and Bread, Man!” just know there is no random cheese sandwich lurking about. It’s our way of expressing frustration without using an obscenity. I have no idea where we got that phrase from, but it always seemed to be a part of our vocabulary. If someone gets on your nerves, you yell, “Cheese and Bread!” the equivalent of “Enough!” If you are excited about winning the lottery, you burst out, “Cheese and Bread! I’m Rich!” It just fits any situation where intense emotion is warranted. Also growing up on the island, almost every single morning, my dad would go to the bakery before we woke up and buy the hottest Butter Bread, just out of the oven. A rich bread that melted in your mouth. This bread is everywhere on the island. It is the go to sandwich bread. This recipe is an homage and a fusion of these two concepts of Cheese and (of course) Brown Butter Bread. Because everyone knows that brown butter makes everything just taste better!
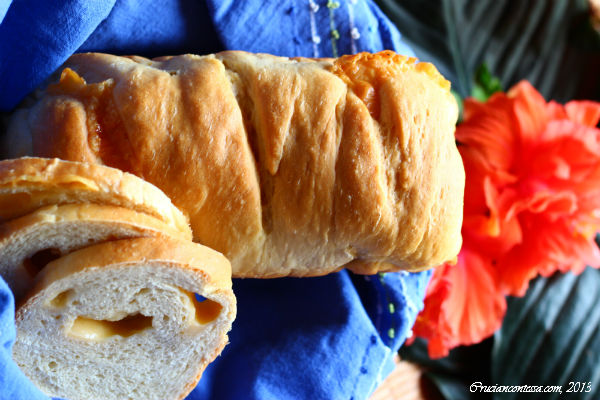
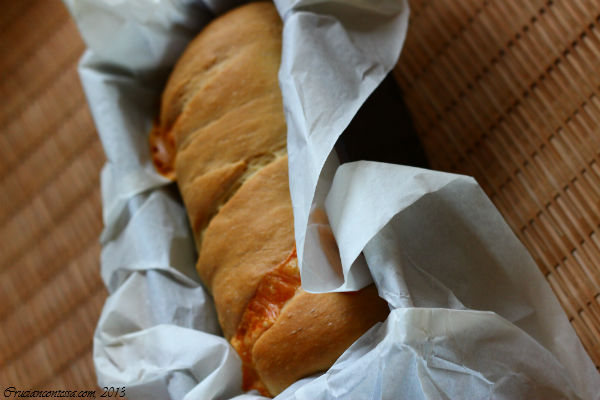
My friend Emile teases me about my passion for Brown Butter. In one of our conversations, he exclaimed, “Cheese and Bread, Man, what’s next, a brown butter bread?” I giggled at the idea, but then thought, “Why not!” And so from all of these influences I tested out recipes for an enriched buttered dough, stuffed it with my all time favorite Smoked Gouda cheese. It’s dense enough to know you are savoring a rich bread, but light enough not to be cloying. It comes out of the oven hot and complaining, as the cheese sizzles its way into a subdued silence from the roiling violence of the baking process. Oh, yes, you don’t eat much of this bread, but you savor the taste!
I broke this recipe up into three phases. Working with bread can take some practice and some time, but once you master the process you will never buy bread in a plastic bag again. My husband and I haven’t bought bread in years! We make all of our own about three times a week. The flavor is simply incomparable!
Ingredients
1 1/3 Cup Warm Water
2 Tablespoons Active Dry Yeast
2 Eggs
4 1/2 Tablespoons Melted but Cooled Brown Butter or Regular Butter
2-3 Teaspoons Sugar
1 Tablespoon Kosher/Sea Salt
5 Cups Bread Flour
1 to 1 1/2 Cup Semi-Soft Cheese of your choice: Gouda, Monterray Jack, Cheddar, Edam…
Directions:
Phase One:
In a mixing bowl place the warm water, the water should be no more than 100 degrees, and yeast to dissolve. Stir in sugar. The sugar is necessary so that the living yeast pellets will now have something to feed on as they awaken. Measure out half of the flour, using the “Dip and Sweep” Method to ensure better accuracy, if you don’t have a kitchen scale. Think about getting a cheap but accurate kitchen scale, if you are going to do some serious baking. It makes a huge difference.
Put the flour mixture in a warm dry place for about an hour. This will help to better develop the flavors. Long slow rises make for tasty breads!
Phase Two:
Add the slightly beaten eggs to the flour mixture along with the cooled but melted brown butter. If you don’t want to use Brown Butter, you can just use regular melted butter, but PLEASE do not use margarine or butter substitute. It HAS to be REAL butter (organic even better).
Add the sea salt. I only use sea salt in my cooking. It is very important to use fine sea salt instead of regular table salt. Sea salt has larger crystals than regular table salt. Substituting regular salt could make the recipe too salty. If you want to use regular salt only use about 2 Teaspoons.
Add the remaining flour and knead until the dough is supple and satiny.
I use a heavy duty stand mixer for all my bread making, but if you are doing it by hand it could take about 6-10 minutes depending on how well you knead. If you don’t have a stand mixer, and plan to do bread baking, I would really encourage you to get one! Just good!
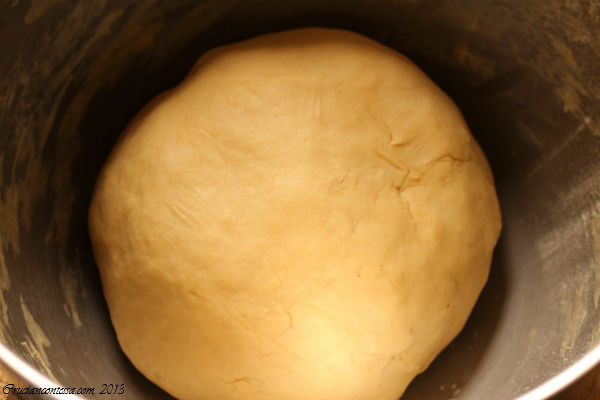
Put the dough mixture back in the warm dry area and let it rise for another 40-50 minutes or until it doubles in size.
This is the place where I have to caution you. This bread has eggs in it. I never leave eggs out at room temperature for more than a couple of hours. So, I divide my rising times into two-one hour intervals before baking.
Phase Three:
After the dough finishes the first complete rise, then scoop it out onto a clean counter space or bread peel.
Divide the dough into two halves.
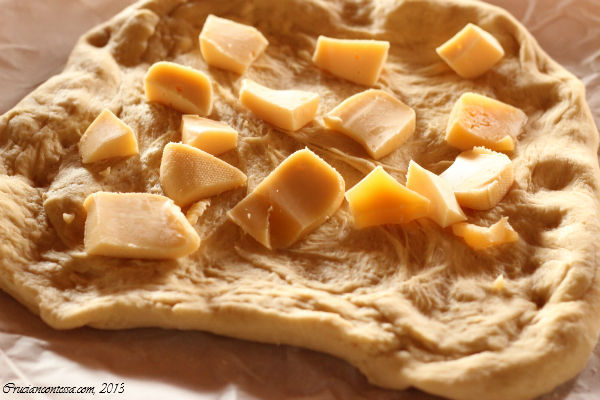
Take one of the halves and, using your hand, stretch it out into a rectangular-ish shape of about 9-10 inches long. You may need to sprinkle a VERY light dusting of flour to keep it from sticking. But not too much, as it will toughen the dough. Soft and supple is the feel you want in your hands as you work with this dough.
Leaving a one inch border around the rectangle, fill the space with the shredded cheese. Since the cheese is very melty, I usually just cut mine into chunks. Take one edge of the loaf and pull it over the cheese. You will have the beginning of a roll here. Then just continue rolling the dough until you get to the end. Pinch the seams close.
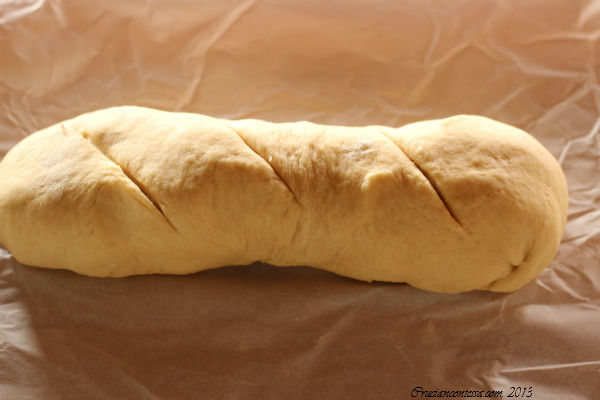
Place in a standard Loaf Pan (about 8×4) lined with Parchment Paper seam-side down.
Heat the oven to 375 degrees.
Lightly slash the top of the bread in three places to allow the bread to properly expand while baking, and place in a warm dry place for the final rise. It should take about 40 minutes to rise. Half way through the rise, brush on a light coating of room temperature water on the top of the loaf. This will give it a nice crust.
After the dough has sufficiently risen, be very gentle not to bang it against anything–the oven door or the oven grates. Treat the loaves like a sleeping baby. To be rough with it might cause it to deflate and you will NOT have the bread that will make you smile on each bite!
Bake for approximately 40-50 minutes. It will be a warmer golden brown although still a bit light in color.
Just to make sure the loaf is done, I always flick my finger against the top of the bread. If I hear a hollow sound, then I know it’s done. The bread will tell you when it’s had enough and is ready to be taken out. Take it out of the loaf pan and peel back the parchment paper. Let it rest on a wire rack.
I know it is BEYOND tempting to tear into the loaf, and I succumb to that pleasure too often. But it really is worth it to give it about a half hour, or so, to let the gases in the loaf redistribute. If you can’t wait then by all means, dig in! Your greed will still be rewarded! But be careful not to burn yourself because the cheese is also very hot and oozing and melty!
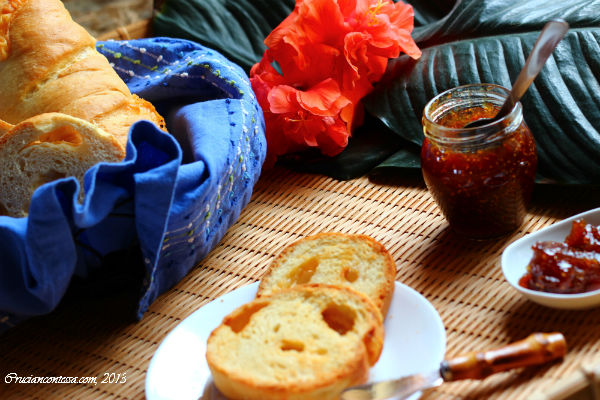
I toasted mine in the toaster oven the next day with some foil paper beneath the slices. I relished in the crispy, golden, cheesy goodness again with some fig preserves. The sweet preserve and the salty smokey cheese and the buttery bread were great! You can also try it out with savory sides like breakfast eggs. But I would NOT advise you to put the slices in a conventional toaster, as the cheese will melt and could be dangerous. You can wrap it in foil paper and warm it up in the oven. It is just as good, if not better the second day!
Grab a cup of Cocoa Tea and ENJOY!
I’m looking at a little drop of drool on my shirt. I’m very hungry now. I better get baking!
LOL, Vicki! I hope you do try out this recipe! It is good!! Share some pics on my FB page if you do! I would love to see how it came out! 🙂
Tanisha, Nissa is always telling me about your passion for cooking. We need to hook up real soon to exchange ideas and cook some dishes together . Happy Cooking!!!!
That sounds wonderful, Sharon! Just say when! I would LOVE that! 🙂
I made this today. It wasn’t hard at all and the bread turned out beautiful! I just want to eat the whole loaf. Thanks for sharing the recipe, Tanisha.
You made my day, Cristal!! I am SO happy it turned out nicely for you! 🙂 Nothing like fresh bread! 🙂